

How To Repair A Hole In Wool Sweater
Introduction
Darn information technology! You lot've got a hole. Non to worry—fixing a hole in a knitted garment is easy. It just requires a needle, some thread, and a bit of patience.
Follow this step-past-step guide for basic instructions on darning. This procedure can be practical to whatever knitted garment from socks to sweaters.
-
-
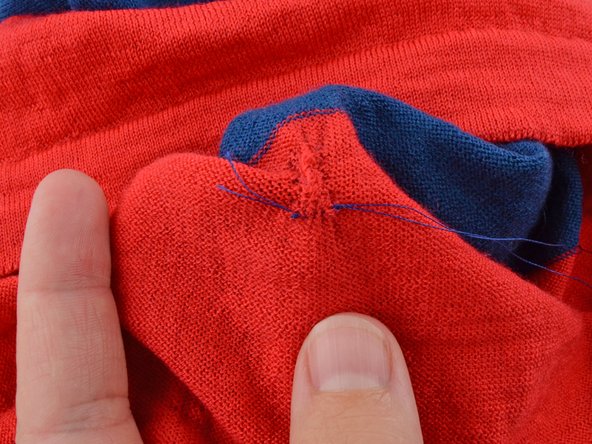
Audit the damage. Make clean whatever clay or debris from the area.
-
Tie off whatsoever loose threads from the hole.
-
-
-
Cut a length of thread.
-
-
-
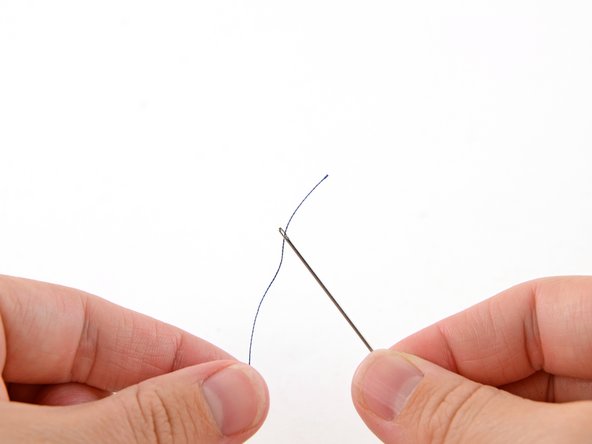
Insert 1 end of the thread through the eye of the needle.
-
-
-
Align the two ends of the thread.
-
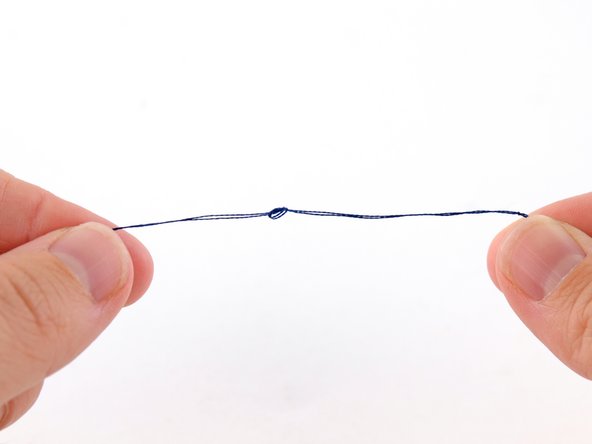
Tie the ends off in an overhand knot.
-
Necktie a second overhand knot to make the knot in the thread larger.
-
-
-
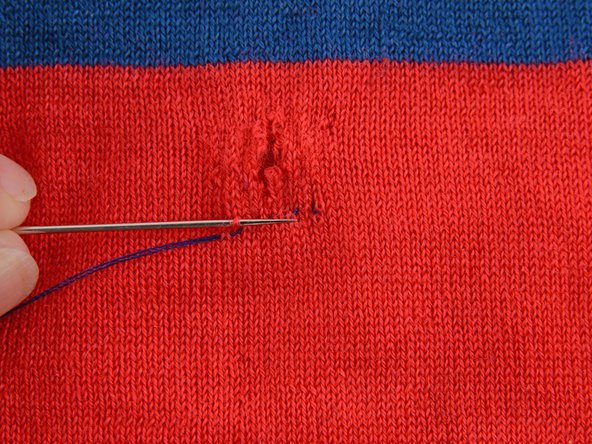
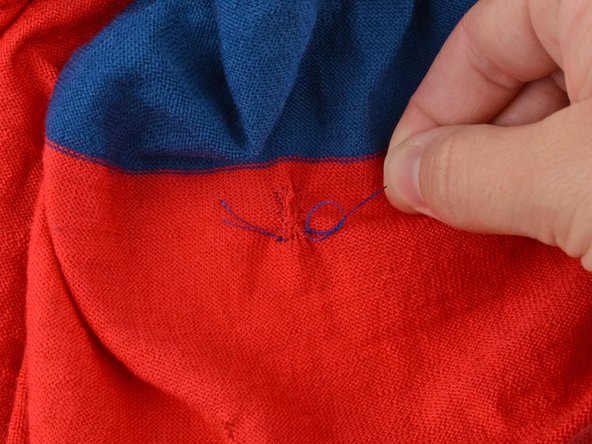
Starting near a centimeter to the side of the hole, and half a centimeter beneath, insert the needle from the back of the garment.
-
-
-
Pull the needle through to the front of the garment until the thread is taut and the knot catches in the back.
-
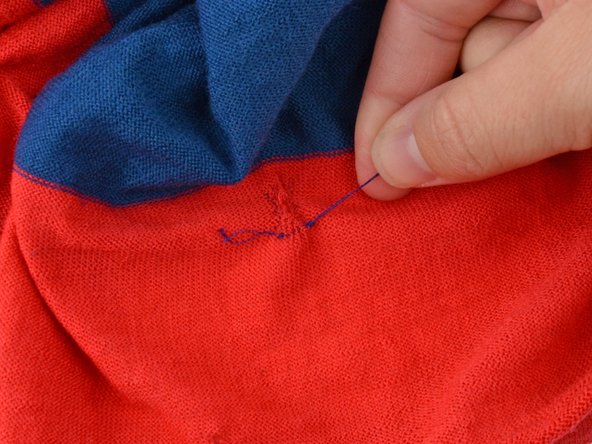
Take a single straight stitch going into a single layer of fabric and coming support one row of the knit closer to the hole.
-
-
-
Pull the needle through until the thread is taut, just not scrunching or gathering the textile.
-
-
-
Take some other straight stitch towards the hole, going in and out of a single layer of the garment, passing the thread nether a single row of the knit.
-
Pull the needle through until the thread is taut, but not pulling or scrunching the fabric.
-
-
-
Proceed working across the hole taking stitches under every other row of the knit.
-
When y'all get almost a centimeter past the pigsty, pull the needle through until the thread is taut, simply not gathering or scrunching the fabric.
-
-
-
Plow the needle around and take a sew going the reverse direction (towards where you lot started) just higher up your last row of stitches.
-
-
-
Pull the thread through until it is taut.
-
-
-
Sew together this 2nd row the aforementioned way you lot did the first, merely in the opposite direction. This time, go under the rows of knit you lot previously went over, and vice versa.
-
When yous accomplish the terminate of this 2d row, turn around and continue stitching in the previous direction. Sew together rows back and along until you take worked about a centimeter past the hole.
-
-
-
When you take finished sewing rows, take the needle and insert it beyond the top corner of your stitching at a forty-five degree angle, taking a stitch.
-
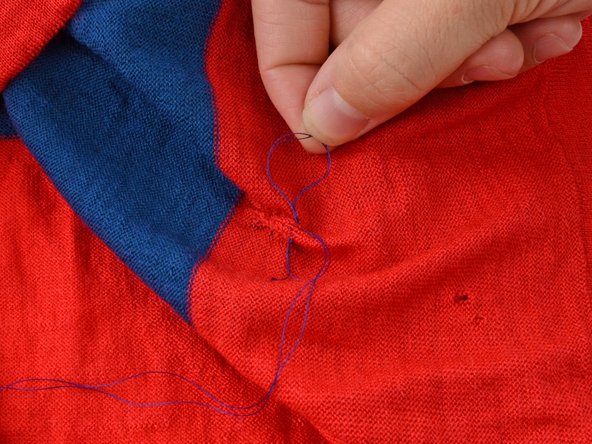
Equally you brainstorm to pull the needle through you will encounter a loop class. Catch the loop with your finger.
-
-
-
Insert the needle into the loop.
-
Pull the needle through the loop.
-
-
-
Pull the thread taut, closing the loop and creating a knot.
-
-
-
Insert the needle at a xl-v caste bending to your previous stitching, taking the needle under one row of the knit.
-
-
-
Pull the needle through until the thread is taut.
-
-
-
Take another stitch crossing your previous stitching at forty-five degrees.
-
Pull the needle through until the thread is taut.
-
Proceed stitching in this manner until you lot come up to the edge of your previous rows of stitching.
-
-
-
When you come to the edge of your stitches, turn the needle around and begin stitching another line of stitches at a forty-five degree angle alongside the line you just fabricated.
-
-
-
Proceed stitching, alternate under and over the rows of knit.
-
-
-
When you have covered all your rows of stitching with lines of stitching at forty-v degrees, check your work to make sure that the fabric is not pulling or gathered anywhere.
-
-
-
Bulldoze the needle into the bottom corner of your stitching.
-
Pull the needle through to the backside (inside) of the garment.
-
-
-
On the backside, accept a small stitch very close to where the needle came through.
-
Slowly pull the needle through the material, creating a loop.
-
Catch the loop in your fingers.
-
Put the needle through the loop.
-
-
-
Pull the needle through the loop, creating a knot.
-
Pull the thread taut, tightening the knot.
-
-
-
Drive the needle under the knot you just created, catching a modest bit of the garment in the sew together.
-
Slowly pull the needle through, creating another loop.
-
Put the needle through the loop.
-
-
-
Pull the needle through the loop creating a knot.
-
Pull the thread taut, creating a knot on top of the knot you lot previously made.
-
-
-
Clip the dangling threads and admire your handiwork.
-


Embed this guide
Choose a size and copy the code below to embed this guide as a minor widget on your site / forum.
Preview
Source: https://www.ifixit.com/Guide/How+to+Darn+a+Hole+in+a+Knitted+Garment/27415
0 Response to "How To Repair A Hole In Wool Sweater"
Post a Comment