

How To Repair 15 Year Old Peerless Bathroom Sink Faucet
Your faucet uses a organisation of valves and handles to control the temperature and menstruation of h2o in your bathtub or shower. In many cases, faucet problems stalk from i of these components. Replacing or repairing a faucet isn't difficult, merely the process volition vary based on your plumbing and the nature of the upshot. Here'southward a look at a variety of solutions for your troublesome faucet or valve.
On This Page:
- Steps to Supersede/ Install Faucet by Type
- Single-handle/Single Valve
- Double-handle
- 3-handle
- Ball or Thermostatic Faucets
- Boosted Considerations
- Tub Spout Diverter Replacement Steps
- Repairing a Leak
- Installation past Brand
- Kohler
- Moen
- Delta
- Is Information technology Time To Upgrade?
- Hiring a Pro
How to Replace or Install Valves past Faucet Type
Important note: Be certain to plow off the h2o earlier y'all begin. If you lot can't find the valve that turns off the shower, turn off the water to the entire house (should exist in basement or exterior). Then turn on the shower and allow the pipes drain out. When yous plow the h2o back on, turn on all of your taps to force out any air that may have gotten in. When the water period is steady, you lot're washed.
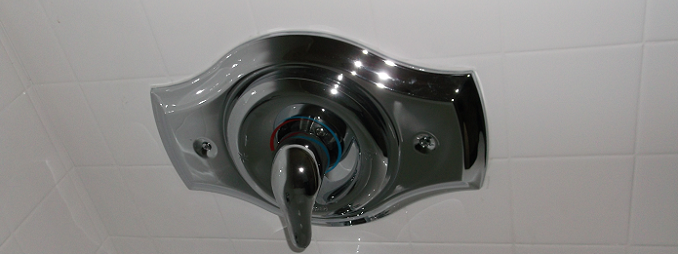
Single-Handle Faucets
Normally plant in unmarried-handle faucets, valve cartridges are cylindrical devices that use O-rings to control the flow of water. Replacement is the easiest manner to gear up cartridge-related problems.
- Time: fifteen minutes to 1 60 minutes
- Cost: $twenty to $100
- Tools:
- Phillips screwdriver
- Small flathead screwdriver
- Pocketknife
- Optional- Handle puller and/or cartridge puller (may crave an adjustable wrench)
- Plow off your water.
- Locate the ready screw nether the handle or cap at the front of the unit. Remove the screw and pull.
- Employ a screwdriver to remove the retainer clip at the top of the cartridge housing. Be sure not to lose this piece.
- Remove the cartridge by gently pulling with pliers. Some manufacturers provide a cap that threads onto the valve to assist in removal. You lot may have to purchase a cartridge removal tool if it'due south stuck.
- Have the one-time cartridge to the hardware store to ensure you get the right replacement. Cartridges are specific to faucet make a model.
- Insert the new cartridge.
- Replace the retaining clip and reassemble your faucet. Turn the water dorsum on to make certain your faucet doesn't leak.
Note: Replacing your cartridge'south O-rings can sometimes help. O-band kits cost around $1.00.
Set to start your shower faucet?
Find Pros
Return to Top
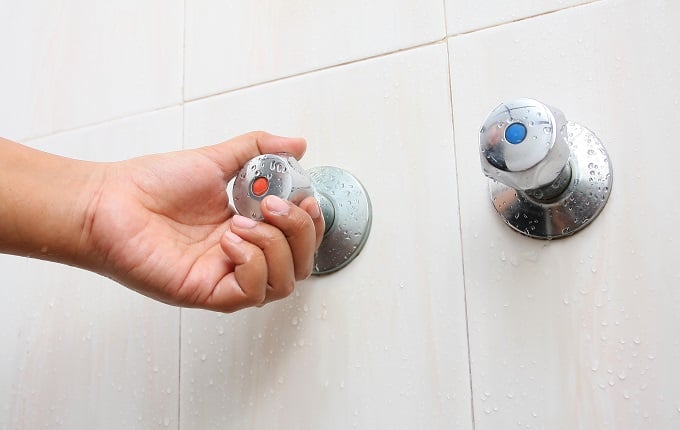
Two-Handle Faucets
Common in ii-handle faucets, stems are mechanisms that use threaded handles and safe seals to open up and close water lines. Installing a new stem is the easiest way to fix a malfunction, simply you can an besides replace faulty hardware like seals and O-rings.
- Time: twenty minutes to i hour depending on experience
- Cost: $1.00 to $3.00 depending on faucet manufacturer
- Tools:
- Phillips screwdriver
- Small flathead screwdriver
- Pocketknife
- Pipage wrench
- Optional- Handle puller and/or shower valve socket wrench
- Pry abroad the index cap at the front of the handle to access the handle spiral. Remove the screw and pull. Use a handle puller if information technology's stuck. Y'all can buy a puller at your local hardware store for between $9 and $xv.
- Employ pliers to gently turn the stem counterclockwise.
- Remove the screw at the end of the stem and install a new washer. Exist sure the replacement washer is an verbal lucifer and coated with petroleum jelly.
- Find the O-band and swap information technology out with a new ane also. Be sure to coat the new O-ring in petroleum jelly.
- Screw in your new stem and add together the handle hardware back in identify.
- If you lot're installing a new stem, throw the one-time ane away and screw in your replacement.
- Put the bonnet nut and handles dorsum on the unit of measurement.
Set to outset your shower faucet?
Find Pros
Return to Height
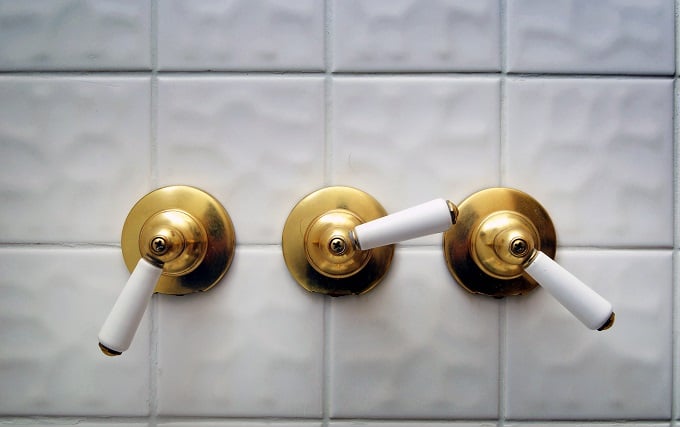
Three-Handle and Diverter Faucets
3-handle faucets have temperature stems (hot and cold handles) and diverter stems. Here'southward how to repair both:
- Time: 15 minutes to ane hour depending on experience
- Cost: $three.00 to $27.00 depending on manufacturer of replacement parts
- Tools:
- Phillips screwdriver
- Small flathead screwdriver
- Pocketknife
- Pipe wrench
- Optional- Handle puller and/or shower valve socket wrench
Temperature Stems
You can ready temperature stalk bug the aforementioned mode you would a two-handle faucet. Here's a quick how-to:
- Pry abroad the index cap at the forepart of the handle to access the handle screw. Remove the screw and pull. Utilize a handle puller if it's stuck. You can buy a puller at your local hardware store for betwixt $nine and $xv.
- Employ pliers or a deep-socket wrench to gently plough the stem counterclockwise.
- Wrap Teflon tape around the base of your stem and screw it into identify.
- Replace the handle hardware.
Wall Diverter Stems
Your wall diverter is usually the tertiary handle in a three-handle valve. Swapping out your faulty diverter valve is the easiest style to address this event. Hither's how:
- Remove the cap and handle as in the single handle guide. Yous may accept a sleeve over yours. Gently remove it, existence conscientious not to mar the finish.
- With a socket wrench, remove the sometime valve.
- Wrap Teflon tape effectually the threads of the new valve, leaving the first few threads bare to ensure a grip.
- Insert the new diverter and give it an extra quarter turn later on it'southward tight. Practice not force information technology.
- With the handle, turn information technology and test the h2o to brand sure it only comes out of where information technology's supposed to. This is as well a good time to smoothen a flashlight into the valve and make certain there are no leaks.
- Reassemble the diverter handle.
Set up to starting time your shower faucet?
Find Pros
Render to Top
Ball and Thermostatic Faucets
Ball and thermostatic valves volition require the help of a professional. These faucet designs utilize complicated designs that aren't as DIY-able every bit stems or cartridges.
Additional Replacement Considerations
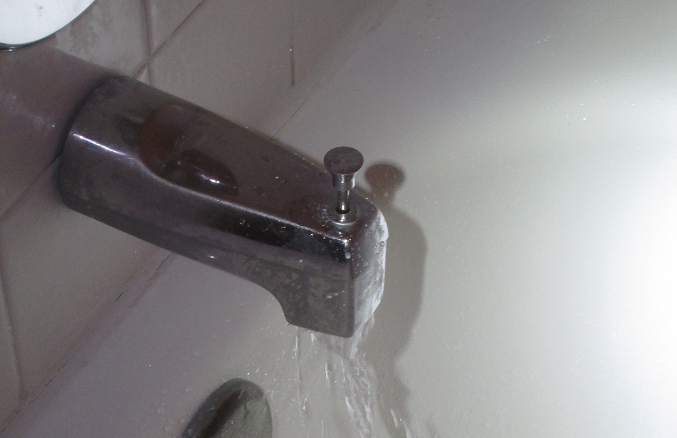
Tub Spout Diverter
A faulty diverter in your spout volition affect the efficiency of your shower. Replacing your tub'due south spout is the easiest way to solve this problem. Hither'south a how-to:
- Time: 15 minutes to ane hour
- Price: $3.00 to $27.00
- Tools:
- Phillips screwdriver
- Pocket-sized flathead screwdriver
- Pocketknife
- Flashlight
- Aqueduct locks
- Shower socket wrench (for wall-type)
- Teflon tape
- Plumber's dope
- Optional– Handle puller
- Using channel locks or a pipe wrench, plow counterclockwise to remove the tub spout. The old pipe should come off equally well. If not, use the wrench to remove it. Some spouts are held on with a set screw. Check for this before trying to turn the spout.
- Clean the wall to ensure a snug fit.
- Your new spout should come up with a new pipe. Wrap both ends in plumber'southward record to ensure a skillful seal.
- Spiral in your new pipe and tighten it with a wrench.
- Spiral on the new tub spout and tighten it with a wrench. Wrap cloth or something protective around the spout to avoid marring the cease. If information technology has a gear up-spiral type, just slide information technology on and tighten.
- Use a bead of caulk where the spout meets the wall.
Return to Top
Repairing a Leaky Faucet
It'southward normal for your shower to drip for a few minutes after the water is turned off. But a steady menstruum may indicate a leak. Replacing your faulty hardware is a common prepare, but leaks can too be stopped by repairing your valve or stalk. Hither's a quick rundown of elementary repairs.
The majority of problems stalk from a faulty valve or component. Bad O-rings and faulty seats and seals are repairable issues. In most cases, replacing the damaged hardware is the best way to improve the event, but gently soaking and scrubbing cartridges or stems tin can remove buildup and ameliorate its sealing capabilities.
Repairing or replacing your faucet components isn't always easy. Call a pro if you're unsure about tackling either of these jobs.
Return to Top
Faucet Installation past Brand
Well-nigh faucet hardware installations are simple. But some can vary based on their brand. Here's a quick guide for the 3 major faucet manufacturers.
Kohler
- Install the spout. You can spiral on your spout if the water pipe has a threaded end. Exist certain to remove the slip-fit associates earlier you lot begin. If the end is smooth, use sand newspaper to rough the end of the piping and and so slide on the spout. Tighten the fix spiral.
- Apply sealant. Apply sealant around the base of the spout. Wipe away whatsoever excess using a clean rag.
- Reassemble the faceplate. Connect your retainer and seal plate. Identify sealant on the dorsum of the seal plate and press it against the wall. Tighten any screws to ensure a water-tight connection. Identify the faceplate over the retainer.
- Add the handle. Place the handle over the valve and secure it. How you secure your handle will vary based on its design.
- Install the showerhead. Place sealant record around the finish of the pipe and spiral on the head.
Moen
- Install the end-tube. Slide the stop tube over the cartridge.
- Replace the trim plate. Identify caulking effectually the outside border of the trim plate and press it confronting the wall. Be sure to attach the eschaton screws likewise. Slide the key- and temperature-stops in place.
- Screw in the level-handle adapter.
- Adhere the handle Place the handle on the adapter and tighten the hex or set spiral.
- Add the spout. Add thread tape to the cease of the pipe. Use caulk to the base of the spout and spiral it in place.
- Concluding Touches. Add together thread tape to the end of the showerhead pipe and spiral the head into place.
Delta
- Install the spout. Add thread tape to the cease of the pipe. Apply caulk to the base of the spout and spiral it in identify.
- Add the O-ring. Slide the O-ring over the faucet.
- Slide in the eschaton Slide it over the cartridge.
- Supersede the trim plate. Place caulking around the outside edge of the eschaton and printing information technology against the wall. Add together the screws and tighten them.
- Attach the handle. Identify the handle on the adapter and tighten the hex or set screw.
- Final Touches. Add thread tape to the stop of the pipe and spiral the head into identify.
Ready to start your shower faucet?
Find Pros
Return to Acme
Is It Time to Upgrade?
Knowing when to upgrade your faucets isn't always easy. Fortunately, there are several clear signs information technology's time for an update. Hither are a few indicators your faucets demand an upgrade.
Mineral Buildup
Hard water volition exit behind a remainder that can bear on the looks and usability of your fixtures. Over fourth dimension, this mineral buildup will accumulate in your valves and showerhead and make replacement a must. Ignoring mineral residue will impact your h2o flow and plough a relaxing shower into a frustrating chore.
Aesthetics
Sometimes a unproblematic faucet and handle upgrade is all that's needed to give your bath a quick facelift. You might exist doing this for a auction, or you may simply be tired of looking at the same style. Regardless, the outdated hardwear can ruin the charm of your bathroom — fifty-fifty later a total remodel.
If you're repairing or replacing a valve or cartridge, go ahead and treat your shower to a whole new look!
When to Phone call a Pro
Don't hesitate to telephone call a pro if y'all're unsure near any part of your faucet repair or installation. DIY mistakes can lead to serious problems like leaks and flooding. Additionally, mishaps can reduce the energy efficiency of your abode, resulting in increased utility bills.
Cheque out our Faucet Installation Cost Guide to larn how much it will toll to hire a professional person for this project.
Return to Pinnacle

How To Repair 15 Year Old Peerless Bathroom Sink Faucet,
Source: https://www.homeadvisor.com/r/shower-faucet-repair-guide/
Posted by: georgetheaking.blogspot.com
0 Response to "How To Repair 15 Year Old Peerless Bathroom Sink Faucet"
Post a Comment